Tuesday, June 7, 2011

Deathly Hallows Bracelet

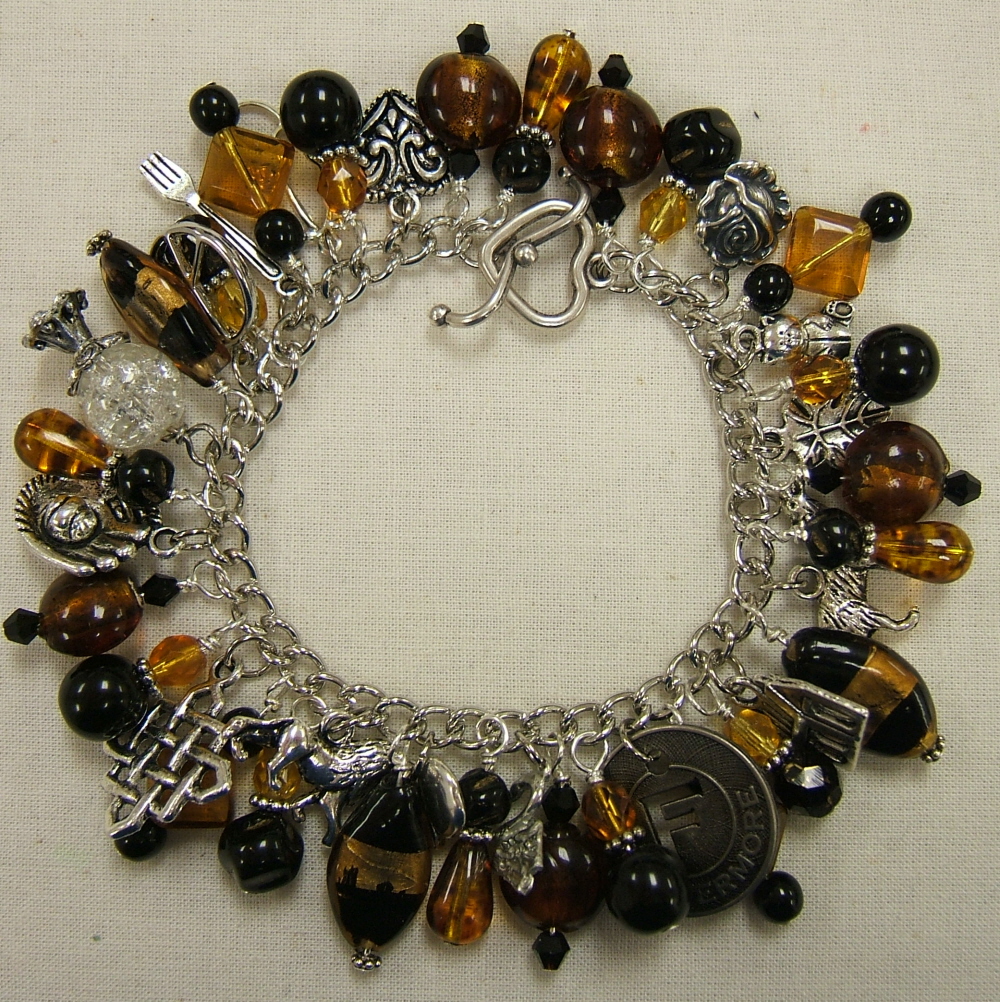
Craftster friend Krafty_Karasu recently asked me to create a Harry Potter charm bracelet for her.  Unlike my usual House themed ones, she asked for one designed specifically around the events that take place in Harry Potter and the Deathly Hallows.  I have to say that it was so nice getting to work with a friend on this project.  I started off by coming up with a huge list of possible charms, relating to various moments or objects within the novel.  Then sent the list to Krafty, and asked her to pick out her very favorites.  It took a few weeks to order some of the ones I didn't have on hand, and it took even longer for me to get the resin-cast charms right, but all in all, I'm thrilled with how it turned out.
 
The beads are a mix of glass, foil lined glass, freshwater pearls and Swarovski crystals in shades of scarlet, gold and black.  The color scheme for me actually represents the warm tones used on the cover of the US edition of the novel, and the black helped create a feeling of seriousness that I think is missing in my strictly red & gold Gryffindor bracelets.  

The bracelet is absolutely loaded with charms. I managed to get 19 on there!  The include:
~Mad Eye's glass eye
~the Tales of Beadle the Bard
~the Sorting Hat
~the spade Harry used to dig Dobby's grave
~Helga Hufflepuff's Cup
~vial of Snape's memories (resin filled glass bottle)
~the Silver Doe that led Harry to the Sword of Gryffindor
~Nagini
~the Elder Wand
~the Deathly Hallows symbol, made from a silver bezel filled with resin
~lighting bolt for Harry
~a phoenix for the Order of the Phoenix who fought at the Battle of Hogwarts
~Hogwarts Castle
~Slytherin's locket, the Horcrux that nearly drove Harry and Ron apart
~a thestral

~a broom
~the dragon the Trio released from Gringotts
~vial of Polyjuice Potion used to create the 7 Potters
~the Snitch from Harry's first Quidditch match, which opened to reveal the Resurrection Stone
 Now I just have to cross my fingers and hope it arrives safely, and that Krafty likes it as much as I do!


Monday, June 6, 2011

Kaylee's Shiny Happy Charm Bracelet

In talking to the lovely Beth Revis the other night, I suddenly realized that I had never made a Firefly themed charm bracelet.  I know, I'm shocked too!  So I set about trying to remedy that situation.  That involved ordering some charms that I don't have on hand and then sitting around waiting impatiently for them to come in.  (Seriously Beads and Charms?  I put in that order a WEEK ago, and it still hasn't shipped yet?!?)  Since I then had Firefly on the brain, I decided to see what else I could come up with, using the beads and charms in my stash.  The result was a shiny happy charm bracelet for everyone's favorite mechanic, Kaylee.
The beads are a mix of glass, Swarovski crystals, lamp work florals, rose quartz, glass flowers, blue & white Chinese ceramics, and purple floral ceramics.
 The charms include: a compass to help you get where you're goin', a "Believe" bead, since whatever Kaylee believes is true, a strawberry for her favorite fruit, gears and workin's, a wrench for fixin' Serenity when she's broke, a guardian Angel to watch over you out in the black...
 A butterfly, a heart since Kaylee is the heart of Serenity, a party dress for attending fancy shindigs...
 A star, a feather, a teddy bear from Kaylee's coveralls, a "Wish" bead, and a happy little sandal.

Sunday, June 5, 2011

Across the Universe Bracelet - Part I

This is the first post in what I hope will be a series on the creation of a charm bracelet, from concept to completion. Specifically on the creation of a very special bracelet based, like many of my creations, on a work of fiction.  Last weekend I was contacted by Beth Revis, author of the bestselling young adult novel Across the Universe.  After seeing my Doctor's Companion bracelets on Etsy, she proposed I create a bracelet based on Across the Universe for her to giveaway on her blog in celebration of the release of the sequel, A Million Suns.

After checking out her wonderful blog and tumblr page it became clear that we have a lot in common, including a love of Doctor Who, Firefly and Harry Potter.  I'm so excited to be working with her, not to mention touched at being thought of for this project. At the moment, I am still awaiting a copy of the book.  Both the Postal Service and the Warren County Library seem determined to keep it from me.  As I read, I hope to post ideas and plans for the bracelet here, and chronicle the process of its creation.

Saturday, June 4, 2011

Butterbeer Fudge

Recently I saw a listing for Butterbeer Fudge on Etsy and I just knew I had to try making some myself.  In an effort to "get it right the first time", I decided to do several different variations all at once, then have friends taste test them all and report back on the findings.  Below is each of the recipes, and some opinions on flavors.  
Batch #1 on the left, and #3 on the right.  Sadly #3 was gone!
And because I wanted to try out using Craftster's new attachments feature, I also created a PDF of all these recipes on pretty recipe cards.  Download them here: Butterbeer Fudge Recipe Cards.


Batch #1
Prof. Pinkleo's Butterbeeriest Fudge

Ingredients
1-3/4 cups sugar
1 jar (7 oz.) marshmallow creme
3/4 cup evaporated milk
1/4 cup (1/2 stick) butter
1 ½  cups butterscotch Chips
¼ cup white chocolate chips
1 cup chopped walnuts
½  teaspoon vanilla nut & butter extract
½ teaspoon rum extract

Directions
1. Line an 8-inch square pan with foil, extending foil over edges of pan.

2. Combine sugar, marshmallow creme, evaporated milk and butter in heavy 3-quart saucepan. Cook over medium heat, stirring constantly, until mixture comes to full boil; boil and stir 5 minutes.

3. Remove from heat; gradually add the butterscotch and white chocolate chips, ¼ cup at a time, stirring until the chips are completely melted. Stir in nuts and vanilla. Pour into prepared pan; cool.

4. Refrigerate 2 to 3 hours. Remove from pan; place on cutting board. Peel off foil. Cut into squares. Store tightly covered in refrigerator. About 5 dozen pieces or about 2-1/4 pounds candy.

Verdict: This fudge has the most intense butterscotch flavor, and is definitely the softest of the 3 batches.  I personally found the butterscotch flavor a bit too strong when I first tried the fudge.  (I've always pictured Butterbeer as being essentially an ale, with a butterscotch note to it, rather than reminiscent of sundae topping syrup.)  After sitting in the fridge for a few days however, I found the flavor had mellowed considerably.  This was the hands down favorite amongst Pinkleo and her kiddos, and has therefore been named in her honor.  Also important to note that this one melted the most in transit.  So if you are planning on shipping some to a friend, I recommend using one of the next two recipes.


Batch #2
Jennie's Favorite Butterbeer Fudge

Ingredients
1-3/4 cups sugar
1 jar (7 oz.) marshmallow creme
3/4 cup evaporated milk
1/4 cup (1/2 stick) butter
1 cup white chocolate chips
1 cup cutterscotch chips
1 cup chopped macadamia nuts
¾ teaspoon vanilla nut butter extract
¾ teaspoon rum extract

Directions
1. Line 8-inch square pan with foil, extending foil over edges of pan.

2. Combine sugar, marshmallow creme, evaporated milk and butter in heavy 3-quart saucepan. Cook over medium heat, stirring constantly, until mixture comes to a full boil; boil and stir 5 minutes.

3. Remove from heat. Gradually stir in white chocolate and butterscotch chips, ¼ cup at a time, stirring until the chips are completely melted.  Stir in the macadamia nuts. Stir in the vanilla nut butter and rum extracts. Pour into prepared pan; cool until set.

4. Remove from pan; place on cutting board. Peel off foil. Cut into squares. Store tightly covered in cool, dry place. About 5 dozen pieces or 2-1/4 pounds candy.

Verdict: This is my personal favorite of the three recipes.  It has a milder butterscotch flavor than batch one, due to the inclusion of a higher ratio of white chocolate chips.  It is sweet and mild, with a vanilla-nut-butter topnote, and a butterscotch finish.  This is also a firmer fudge, which feels almost "al dente" when you bite into it.  The macadamia nuts are definitely great in this.  Their mild flavor doesn't compete with the butterscotch the same way the walnuts did in batch #1, but their crunch is lovely.  It held it's shape better in shipping than batch #1, but if you are thinking of mailing it, I'd either wait till cooler weather or go for batch #3.


Batch #3
Gratia's Grownup Butterbeer Fudge

Ingredients
Fudge
1 cup Butterscotch Chips
1 cup  White Chocolate Chips
2/3 cup sweetened condensed milk (not evaporated milk)
1 cup chopped walnuts
½ teaspoon vanilla nut butter extract
½ tsp rum extract
Topping
1 cup White Chocolate Chips
⅓ cup sweetened condensed milk
½ tsp vanilla nut butter extract

Directions
1. Line 8-inch square pan with foil, extending foil over edges of pan.

2. Melt white chocolate and butterscotch chips with sweetened condensed milk in medium saucepan over very low heat, stirring constantly, until mixture is smooth.  (If doing this with children, you can also do this step in the microwave.  Set it to medium and start with a 30 second heating.  Then do 10 or 15 second bursts, stopping to stir each time.)

3. Remove from heat. Stir in walnuts, as well as vanilla nut butter & rum extracts. Spread into prepared pan.

4. Meanwhile, place 1 cup white chocolate chips and ⅓ cup condensed milk in a microwave safe bowl.  Microwave on MEDIUM for 30 seconds, stir.  Continue microwaving at 10 second intervals, stirring between each, until chips are completely melted. Stir in vanilla nut butter extract.

5. Pour mixture over fudge, in light ribbons, trying to spread it out as evenly as possible.  You want a thin and even top layer that covers the whole pan.

6. Cover; refrigerate 2 hours or until firm. Use foil to lift fudge out of pan; peel off foil. Cut fudge into squares. About 3 dozen pieces or 1-1/2 pounds fudge.

Verdict: This batch is the firmest of the three, and held it's shape in shipment surprisingly well. The top layer of white chocolate looks like the foamy head on the top of a glass of freshly poured butterbeer, which is a definite plus.  It also has the added benefit of being able to be made totally in the microwave, and therefore safer for kids & teens to make on their own.  The cute top layer however made this batch a little to heavily vanilla for me.  If I were to repeat this recipe, I would probably tweak it so as to add more butterscotch chips and less vanilla in the main portion of the fudge (maybe 1 1/2 cups butterscotch & 1/2 cup white chocolate) so that the vanilla on top would be more of a contrast.  That however, would probably also make the fudge itself softer, and more melty when shipping.

Finally a note about batch #3's name:  Good friend, former student, and swap co-organizer Ex_Gratia has just graduated and gotten her first full-time professional job working at Louisville Ballet!  Since the top layer of the fudge made it resemble a real beer, I thought it appropriate to name it after my now "grownup" friend.

NOTE: For best results, do not double ANY of these recipes.

Friday, June 3, 2011

Using the "Extras"

While making so many Doctor's Companion Bracelets lately, I've been ordering and using a great many of these Muse Tokens, by Tim Holtz.  All the tokens are lovely, but I've only been using the "Wonderful" tokens in my companion charm bracelets.  Problem is that each package only contains one of the "Wonderful" tokens that I need, leaving me with 11 other tokens to find uses for.  The other tokens included in the mix are Significant, Thoughts, Moments, Unique, Excellence, Courageous, Genuine, Knowledge, Lifetime, Forevermore, and Journey. 
Recently I've been trying to come up with some more creative uses for the "extras" as I've been calling them.  I managed to use some of the Forevermore and Lifetime charms in my Bella's Journey bracelet this past weekend.


Earlier this week, I created some more Doctor Who related items.  Using the Journey token and some TARDIS blue beads I made these two Journey Bracelets & I Love the Doctor Earrings.  The first is made of opaque blue glass, and the second is blueberry quartz.

Last night I continued on that same theme, but focused on some Harry Potter goodies.  I made three of these Couragous Bracelets and Brave at Heart earring sets, at least one of which I think is going to be donated to Gracious Rain's Deathly Hallows Part II Premier Party.  Apparently Launi & the folk at Gracious Rain have reserved a 200 seat theatre for the movie premier, and are hosting a whole lot of giveaways as part of the festivities.  They asked me for a donation to their prize stash, in return for handing out copies of my business card in their goody bags.  How could I turn down an offer to make someone's movie premier better?   
While I was at it, I did a Ravenclaw themed set too.  Knowledge Bracelet and Wise Owl Earrings.  And yes, I know the colors of Ravenclaw house are blue and bronze in the book, but as I had silver Knowledge tokens to use up, I went with the movie color scheme of blue and silver instead.  And they really do look rather pretty together.
Finally, I decided that I needed a way to use up several of the remaining tokens at once.  I liked the idea of doing something that mixed up the metallics, instead of sticking to one color.  Out of all the tokens, the ones I had been able to come up with the least uses for were the antiqued copper Significant, Thoughts, Moments, and Unique, and the antique bronze Excellence and Genuine. This bracelet was an attempt to get as many of them together as possible, and is based on the idea that all of us need a little extra inspiration sometimes.
Aside from the Muse tokens, the bracelet also features a silver feather, a copper quatrefoil, an antique brass angel, a gunmetal scrolly bit, a coppery flower, and a brass key, all mixed in with chunky deep purple Czech glass beads.  Now I just have about 6 more copies of each of those copper tokens to come up with uses for...
Thursday, June 2, 2011

The Cullen Family & Bella's Journey Bracelets

I realized that I hadn't created any new Twilight bracelets in a while, so I took advantage of the long weekend to make some new ones.  The first represents each member of the Cullen family, and some of their favorite places and hobbies.  The colors were taken from the descriptions of their golden amber eyes.


The second one represents Bella's Journey throughout the story.  It is done in the black, white and red color scheme of the novels.

Monday, May 30, 2011

Resin Bottle Cap Pendants

I made a ton of resin filled bottle caps a while back, and then promptly forgot to do anything else with them.  (Well, some didn't turn out well, so I probably "forgot" on purpose.) 


I pulled some of them back out a few weeks ago to turn into necklaces.  I think they came out pretty cute.  I am going to have to make more of them soon, but I always seem to drag my feet when doing resin-casting.  Probably because I have so many items NOT turn out, compared to the few that do.   


 Gryffindor

Hufflepuff

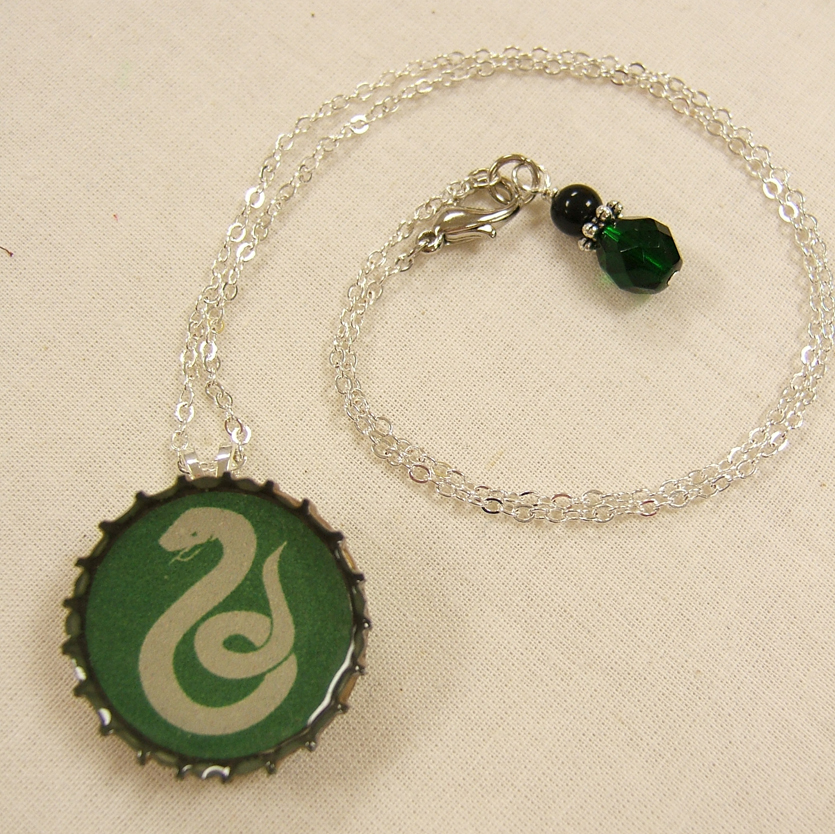
Slytherin


With All My Heart
(Heart image from The Graphics Fairy)


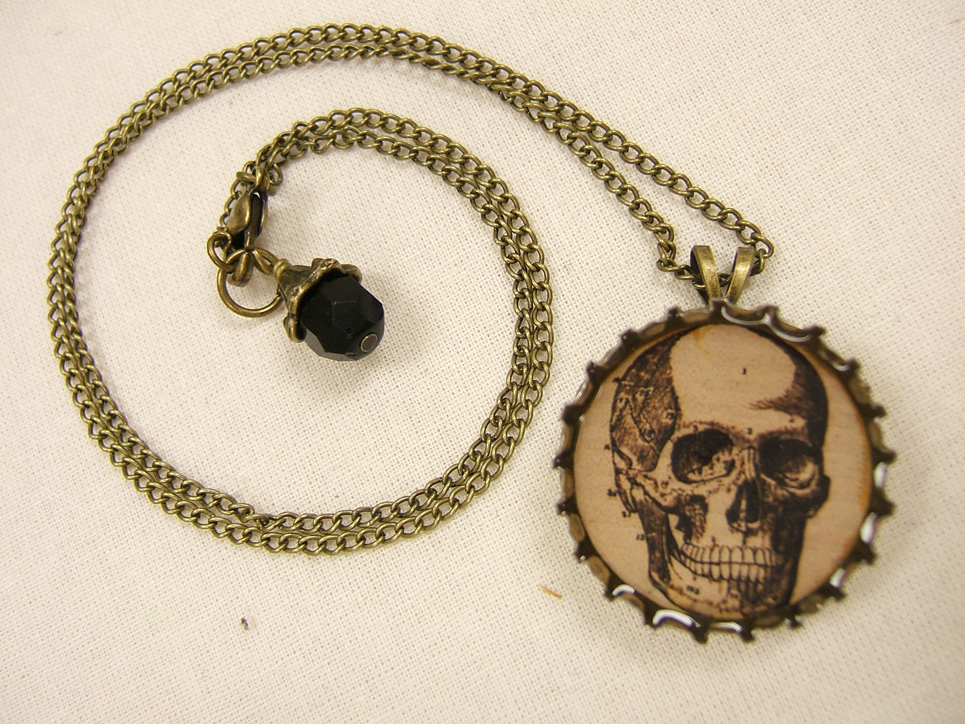
Bones and All
(Skull image from The Graphics Fairy)